导读
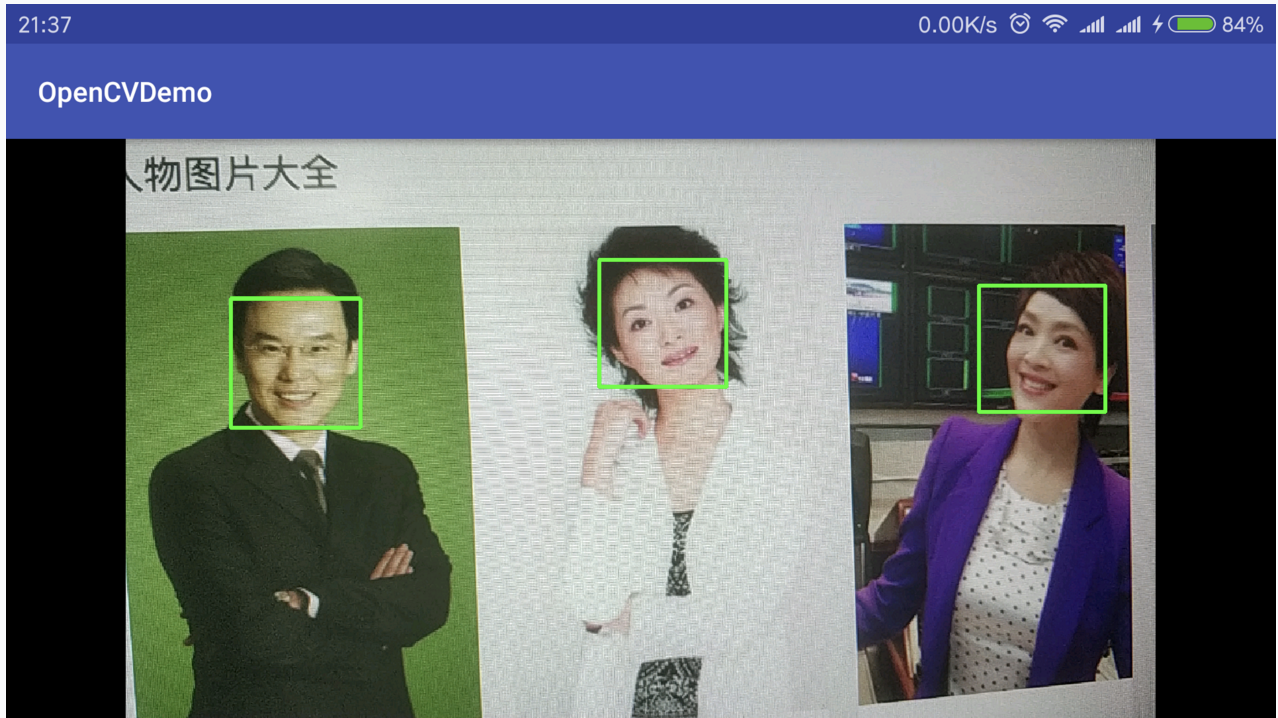
OpenCV 是一个开源的跨平台计算机视觉库, 采C++语言编写,实现了图像处理和计算机视觉方面的很多通用算法,同时也提供对Python,Java,Android等的支持,这里利用Android下的接口,实现一个简单的人脸检测;
首先需要说清楚这里是人脸检测,不是人脸识别,网上很多资料说实现人脸识别,最后一看明明是人脸检测。
人脸检测:是找出人脸,并标记出人脸。
人脸识别:检测出人脸,并能够通过学习,给出人脸信息,比如,给定一个人脸A,通过学习,在之后的众多检测中能够找出人脸A,这才是人脸识别;
准备工作
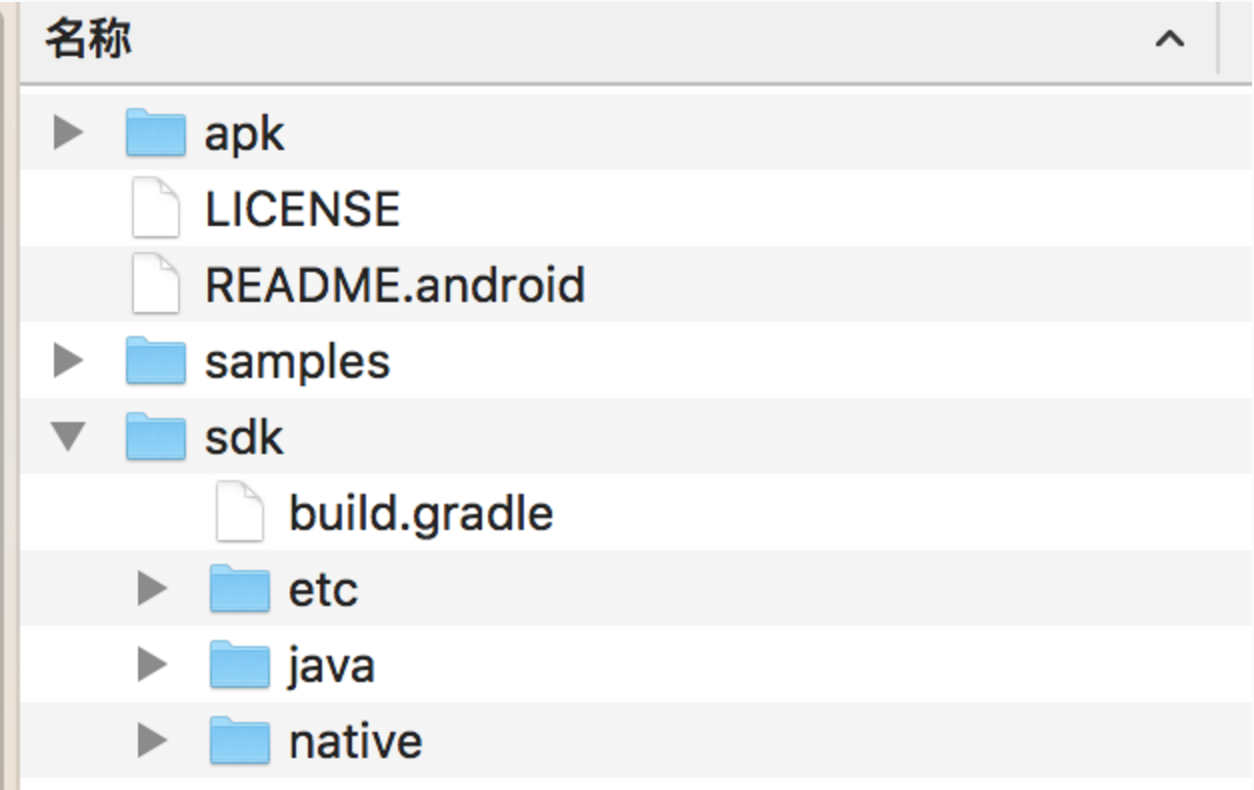
首先到http://opencv.org/releases.html下载相应的开发工具,我下载时latest version是3.4.1,选择Android pack。开发包比较大,我下载时已经300多M。下载后解压缩,得到如下目录结构;
新建AS项目,OpenCVDemo,然后File > New > New Module,选择Import Eclipse ADT Project;
把下载下来的目录下sdk/java 下的项目导入到项目里。此时生产的Module名称为openCVLibrary2411,版本不同这里名字会不同,后面添加依赖时,需要注意!
然后将刚新建的这个modules 添加依赖到 app modules里,
直接在 app 目录下build.gradle 文件里dependencies 下添加:1
compile project(':openCVLibrary2411')
然后在 app/src/main 目录下创建一个jniLibs 目录,然后把sdk/native/libs 下全部文件 copy到jniLibs下,编译通过。
修改新建模块下 build.gradle 文件,把 compileSdkVersion 与 targetSdkVersion修改成你最新的SDK版本,如我的:1
2
3
4
5
6
7
8
9
10
11
12
13
14
15
16
17
18apply plugin: 'com.android.library'
android {
compileSdkVersion 27
buildToolsVersion "26.0.2"
defaultConfig {
minSdkVersion 21
targetSdkVersion 27
}
buildTypes {
release {
minifyEnabled false
proguardFiles getDefaultProguardFile('proguard-android.txt'), 'proguard-rules.txt'
}
}
}
我app下的build.gradle文件如下:1
2
3
4
5
6
7
8
9
10
11
12
13
14
15
16
17
18
19
20
21
22
23
24
25
26
27
28
29
30apply plugin: 'com.android.application'
android {
compileSdkVersion 27
defaultConfig {
applicationId "com.jiajia.opencvdemo"
minSdkVersion 21
targetSdkVersion 27
versionCode 1
versionName "1.0"
testInstrumentationRunner "android.support.test.runner.AndroidJUnitRunner"
}
buildTypes {
release {
minifyEnabled false
proguardFiles getDefaultProguardFile('proguard-android.txt'), 'proguard-rules.pro'
}
}
}
dependencies {
implementation fileTree(dir: 'libs', include: ['*.jar'])
implementation 'com.android.support:appcompat-v7:27.1.1'
implementation 'com.android.support.constraint:constraint-layout:1.1.0'
testImplementation 'junit:junit:4.12'
androidTestImplementation 'com.android.support.test:runner:1.0.2'
androidTestImplementation 'com.android.support.test.espresso:espresso-core:3.0.2'
implementation project(':openCVLibrary2411')
}
OK, 上面就是所有的准备工作;
实现人脸检测
只需要有一个MainActivity即可,首先申请相应的权限1
2
3
4
5<uses-permission android:name="android.permission.CAMERA"/>
<uses-feature android:name="android.hardware.camera" android:required="false"/>
<uses-feature android:name="android.hardware.camera.autofocus" android:required="false"/>
<uses-feature android:name="android.hardware.camera.front" android:required="false"/>
<uses-feature android:name="android.hardware.camera.front.autofocus" android:required="false"/>
如果是Android是6.0以上,调用相机需要动态申请权限(小Demo,我直接在
设置中为应用赋予了权限);
修改MainActivity代码如下:
1 | public class MainActivity extends AppCompatActivity implements CameraBridgeViewBase.CvCameraViewListener{ |
简单分析:
首先onCreate方法中设置屏幕常亮.1
getWindow().addFlags(WindowManager.LayoutParams.FLAG_KEEP_SCREEN_ON);
然后新建了一个布局openCvCameraView,这个布局文件是OpenCV封装好了,不需要我们重写布局文件,因为请看setContentView方法,这和平时我们写Activity是不一样的。1
2openCvCameraView = new JavaCameraView(this, -1); // 新建一个布局文件
setContentView(openCvCameraView); // 为该活动设置布局
然后为这个布局类设置了回调监听, 因为我们的MainActivity实现了CameraBridgeViewBase.CvCameraViewListener,所以监听器就是本身;1
openCvCameraView.setCvCameraViewListener(this);
实现了该监听器,就需要实现onCameraViewStarted onCameraViewStopped onCameraFrame这三个方法,具体实现的逻辑就在这三个方法中,涉及到很多数据知识,就不多说了(我也不是很懂!!!)
参考资料
最后
此致, 敬礼

